Showing posts with label How Tuesday. Show all posts

Tuesday, October 30, 2012

How Tuesday: Pumpkin Spice Sugar Scrub


This time of year, everything seems to come in a pumpkin flavor or scent. Candles, I get...coffee, not so much. Maybe it is because I am a tea girl. I figured that my hands shouldn't miss out on all the seasonal fun. This scrub is a variation of the recipe from Under the Table and Dreaming. 


Tuesday, September 18, 2012

How Tuesday: Craft Tutorial Round-Up


In the words of Calvin (to his good buddy, Hobbes), "The days are just packed." Although autumn is my favorite time for new beginnings and new projects, the week that play rehearsals begins is always a bit hectic.  Although I have not had much time lately to make a ton of new projects, I am constantly thinking of new ideas and gathering inspiration.

 I love to make things and learn something new. Please take a moment to check the blogs in my side bar, they are some of my favorites! 

In addition, these great websites and blogs are wonderful resources  for craft ideas and tutorials:


Tuesday, September 11, 2012

How Tuesday: Confetti Tumblers


Today is one of those posts that you see all over Pinterest and just have to try yourself. These glasses are so cute and whimsical that I will enjoy my morning juice that much more. They would make a great gift for the upcoming holidays as well. 


Tuesday, August 28, 2012

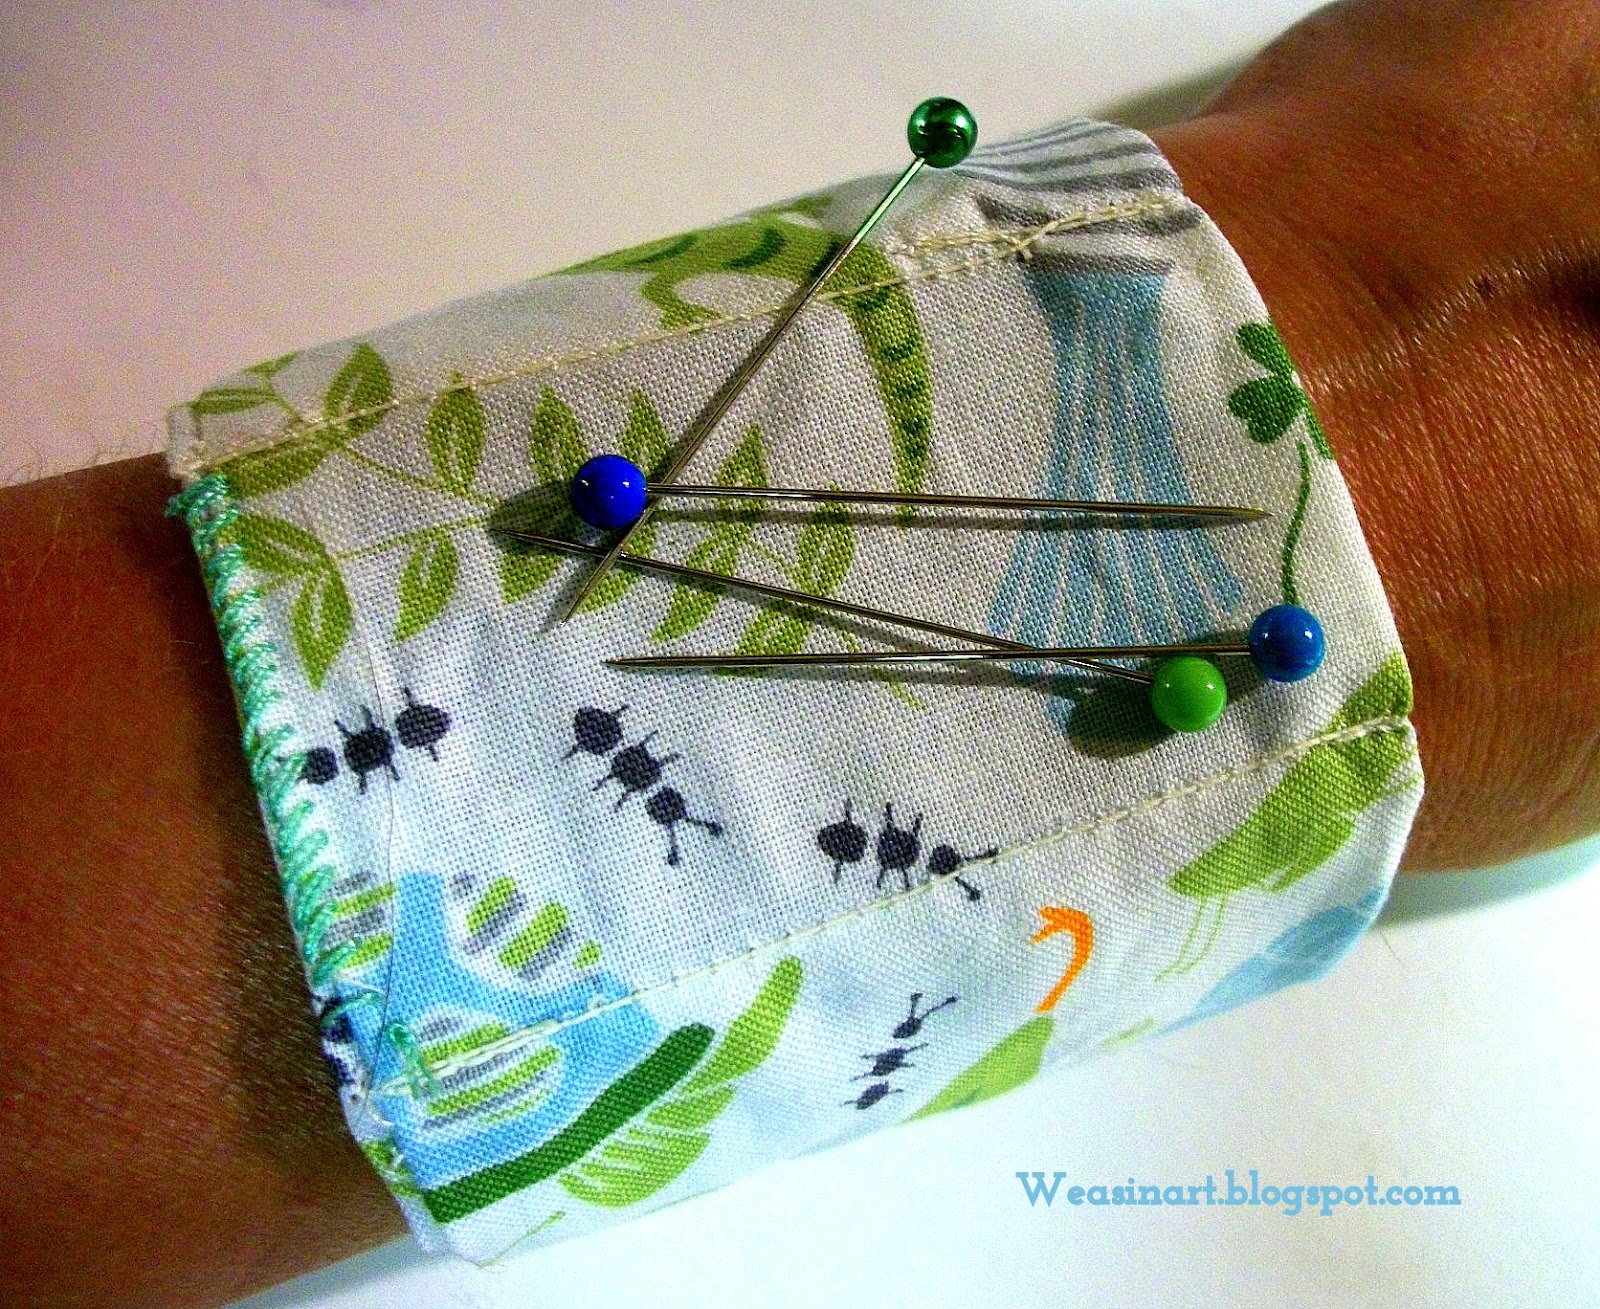
How Tuesday: Wristband Pin "Cushion"


So, if you are anything like me, there are pins ALL over your studio. Granted, I have a magnetic pin block on my cutting table, a plushie tomato pin cushion next to machine, even the top of my sewing box is a pin cushion. And yet, as I sew, pins come out of my piece an onto the sewing machine table...and onto the floor...and into my sock. Sigh. When I saw a photo of a wristband pin holder on Pinterest, I knew that it was meant for me.

Tuesday, August 14, 2012

How Tuesday: Upcycled T-Shirt Tote Bag

Everybody loves an event with swag. At least most of the time...too much swag just becomes clutter or things that we never use.

I could and would never wear half of the t-shirts that I get at races. What I would use is more reusable shopping bags. Problem solved: turn on into the other!


After choosing your shirts, lay them out on you work surface.


Cut off the sleeves, preserving the side seams.


Use a template to shape the opening around the neck.
Cut around template. I used a bowl.


Mark the bottom where you are going to sew the short shut.
I also decided the angle some side seams so the bag would be 
wider on the bottom. The angle sides serve as a psuedo-gusset.


Sew along your markings. I did two hems around each
side for added stability.


I filled one with running gear...


...and used the other for some groceries.

You can keep the memories with these great shirts,
but use them more frequently and usefully!

Tuesday, May 22, 2012

How Tuesday: Doctor Who Washi Tape

I am not a a girl who is super trendy...geeks rarely are. I was loving Doctor Who LONG before it was the greatest thing going. Granted, the current trendy bit makes it easier to get Whovian merchandise! One trend that I am intrigued by but have not yet embraced is washi tape. 

What better way to celebrate it than to combine it with one of my favorite things? 

Ready to adorn!!
My supplies: double-sided tape, Doctor Who comics (picked
up at my local thrift store for a song), brayer, and scissors.
Chose the images you love and place them FACEDOWN.
Place the tape over the sections that you want.
Roll with brayer to assure maximum stickage.
Cut along the tape to make strips.
Roll, enjoy, adorn to your (two) hearts content!

Tuesday, May 8, 2012

How Tuesday: Portlandia Bird Mobile

Today's craft--super simple, simply marvelous. Using the Portlandia bird, I created a mobile to jazz up my kitchen.


I downloaded an image of the bird used on Portlandia,
but any bird would do. I traced it onto card stock and cut it out.
I gathered some twigs from my yard and but an eye hook in  one to
hang from the ceiling and attach the other sticks.
I used 22 gauge wire to add loops to the other sticks and
attached all three with jewelry wire. I punched hokes in the birds
and hung them from the twigs with thread.


Tuesday, May 1, 2012

How Tuesday: DIY Seed Tape

April showers bring May flowers, so now that it is May--bring on the garden!
There are times when I really enjoy getting my hands down in the earth and planting seeds and bulbs.
There are other times when I just want to get things in the ground.

I love the idea of seed tape, especially for tiny seeds like lettuce. The problem is that commercially-produced tapes are so expensive. This handmade tape is simple and inexpensive--a great craft to do with the kids!


Supplies: Cornstarch, water, crepe paper, seeds, paint brush

Combine 1 tablespoon cornstarch and 1 cup of water and heat over medium heat.
Stir frequently until a gel forms. This is your seed glue! 

Lay out you crepe paper--use white or kraft paper so
the colors don't bleed.

Dot the paper at intervals (as indicated by your seed packet)
with the cornstarch glue. Place your seed on top.

In the case of lettuce seeds, I just sprinkled them on top.

Fold the paper over to enclose the seed.
After the glue dries, roll them to prepare for planting.

Dig a furrow and you are ready to go!

Tuesday, April 24, 2012

How Tuesday: Printing with Lace


I enjoy being girly. I am obsessed with dresses, painted toes, and fancy pastries. What is more girly than lacy stationary? Nothing. Here's how you do it:


The finished product!


The supplies include:
-blank cards or card stock
-lace
-brayer (it would be even better to have two)
-glass surface (I used an old collage frame)
-block or screen printing ink
Using the brayer, spread a layer of ink onto the glass.
lay the lace on top and run the brayer over it until the
lace is saturated.
Place the lace on the card. Cover the lace with a piece
of paper and roll a clean brayer over it. I only had one, so I used a can
from my pantry,
When printing photo mats, I used painter's tape to create mitered
corners. Place the tape in the corners, print the area, and remove the tape.
After 30 minutes, place the tape on the already printed sides and complete the frame.


Now you can share your girly tendencies with the world! Perfect for
wedding or shower invites, birthday cards, or just staying in touch!


Tuesday, April 17, 2012

How Tuesday: Capturing the sun


Last night, I was having doubts about this blog. Readership is low and I was uncertain of its value. Is anyone actually enjoying it? Hmmm...


 Then I went to play rehearsal. What a disaster...doubt about all my creative pursuits abound. 


Then I remembered this week's theme: sunshine. Ralph Waldo Emerson once said, " Most of the shadows of this life are caused by our standing in our own sunshine."


If no one else is reading the blog isn't really the point. The point is to be accountable to my creativity. The point is to live the life I want as an artist. I am glad that today's post is How Tuesday. I need today's activity more than ever--I have captured the sunshine. 


I made several solar prints to hang in the studio to remind me of the outdoors and my connection to nature as I work. Here's how I did it:


I bought photo-sensitive paper at my local science
museum but it is also available online.
I gathered some items from my yard for my prints.
I placed the items in front of the paper inside the frame.
Because the plants were in the thick side, I clamped the frame closed with
a binder clip. 

After a few minutes in a sunny window, I removed the plants.
The longer the paper is in the sun, the greater the contrast.

I decided to make a sewing specific piece for my sewing studio using
buttons, lace and fun trim.

All done and ready for framing!

I added the sewing print to my cutting area. The light is not a good as
I would have liked it for this photo, but it came out very well.

Framed my 3 favorite nature-inspired prints in inexpensive frames 
from the dollar section of my local craft store.


No matter the weather outside or my mood,
 I will always have these prints to remind me of sunny days.


Tuesday, April 10, 2012

How Tuesday: Commitment Phobia

My hands are sore. Like, hurt to bend my fingers sore. My arm is tired from lifting my hammer. It is like a good workout...it is a good kind of sore. I am back in the saddle, although it has taken me a few tries each day to really get into the groove. 


Nothing, though, is permanent. I may be able to stay on the the streak and make new pieces everyday. I got a fun new tool today that will pique my interest for the immediate future. I may not though. Nothing is permanent. Okay, maybe one thing is... tattoos. Lots of my friends sport a little ink. I would, but I am not a fan of pain...or very confident about how it would age. 


I figured if I wasn't going to get one myself, I would make one. Inspired by vintage motifs, it is a tiny piece of nostalgia around your neck. I come from a line of sailors, so it seemed appropriate.


Inspired by my grandparents. My grandpa was in the Navy and
I regret never seeing his actual dog tags.
The piece is an aluminum dog tag, a copper banner, and copper rivets.
This piece is a copper heart, brass banner, and vintage chain.

First, I stamped the words onto the banner. I used a
pre-cut banner piece, but you could cut your own.
I started from the center of the piece and stamped out from there
to keep the phrase centered. 

I used my chasing hammer to deckle the edges and then
used my round nose pliers to give the banner movement.

After a dip in the liver of sulfur bath.

I used my Crafted Finding rivet tool to attach the two pieces.
I added a vintage heart charm that also reminded me of an
old-school tattoo.

The rivets from the back. Check out the finished piece at
the top of this tutorial.