Fall is a time for new beginnings, I think. I know that Spring is a more commonly held time to start anew, but the new school year always makes me more creative. I adore Moleskin notebooks of any kind, but wanted my fall sketchbook to echo that sense of what could be.
Showing posts with label stash buster. Show all posts
Saturday, September 15, 2012
Saturday, September 1, 2012
Stitchy Saturday: Steering Wheel Cover
I live in the heart of Central New York. That means hot summers and frigid winters. All summer long, I have been burning my hands when I hop in the car after work.
I know that before long, my fingers will fell as though they are freezing to the wheel. It was time to add a little more me into my ride while helping myself out at the same time. The steering wheel cover coordinates with the seat belt cover that I made earlier this week.
Nigel, my Beefeater co-pilot approves.
Thursday, August 30, 2012
Thankful Thursday: Seat Belt Cover
Some days, I have a tougher time identifying what I am thankful for than others.
Today though, I do not have to struggle.
I am thankful for this blog and the ability to share. I am thankful that with prior planning, I can make life simpler down the road.
I am thankful that my sweetie always has my back.
I am thankful for many little things. I am not thankful for my seat belt digging into my neck while I drive just because I am petite. I AM thankful that in just a few minutes I could make something that solves that problem and shows a little bit of my personality!
Labels:
car,
cotton,
craft,
DIY,
needlework,
seat belt cover,
sewing,
stash buster,
stitching,
tutorial
Tuesday, August 28, 2012
How Tuesday: Wristband Pin "Cushion"
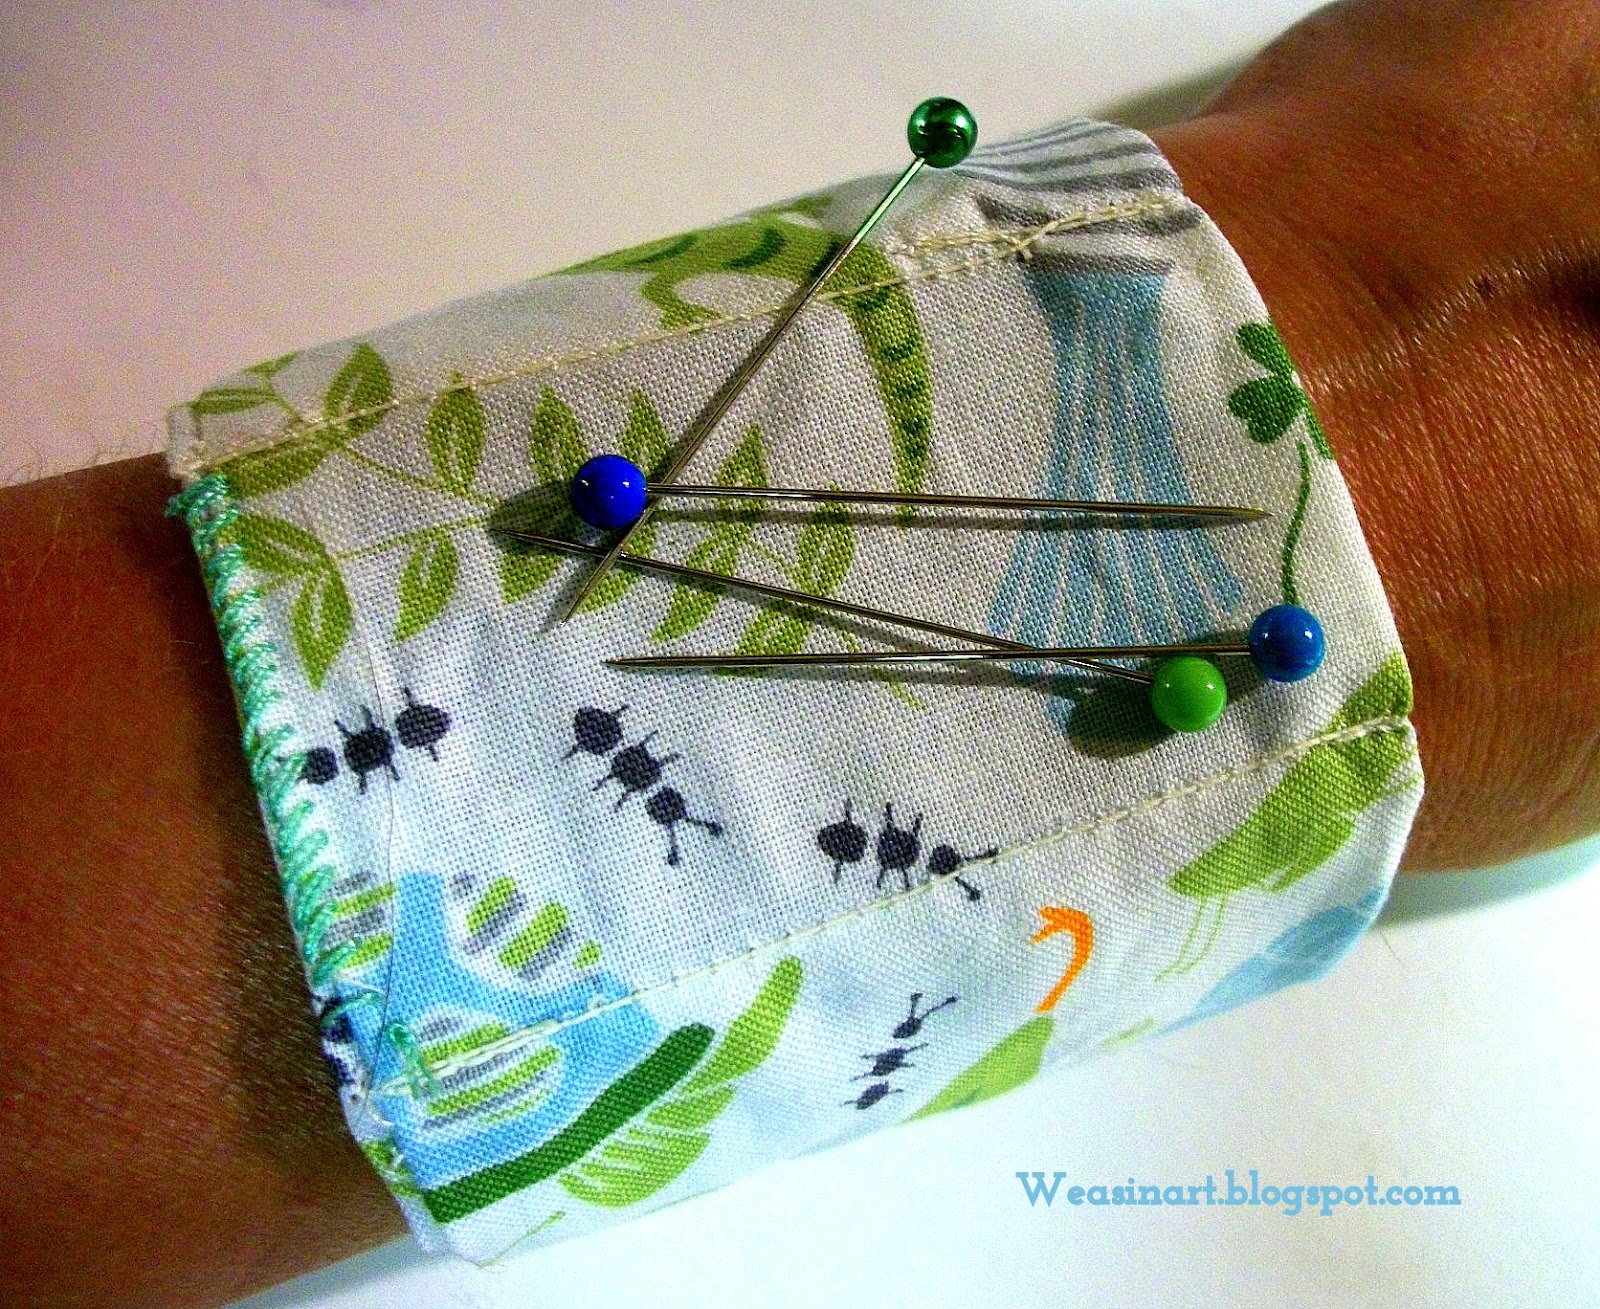
So, if you are anything like me, there are pins ALL over your studio. Granted, I have a magnetic pin block on my cutting table, a plushie tomato pin cushion next to machine, even the top of my sewing box is a pin cushion. And yet, as I sew, pins come out of my piece an onto the sewing machine table...and onto the floor...and into my sock. Sigh. When I saw a photo of a wristband pin holder on Pinterest, I knew that it was meant for me.
Saturday, August 25, 2012
Stitchy Saturday: Fat Quarter Apron
Who says that a) you can't be adorable while you toil away in the kitchen or b) that a fat quarter that you love has to be relegated to a quilt? I say, embrace the fabrics that you love and make yourself the envy of every other kitchen guru at the same time...
This apron takes one fat quarter, a half-yard of coordinating fabric, trim (if you desire), and about an hour!
Sunday, August 12, 2012
Sunday Fun Day: Button Headband
Some days start in the middle of the night. Today was one of those days. Mid-August marks the peak of the Perseid Meteor Showers. When you have a sweetie that was an astronomy major in college, this is a big deal.
Hence, a Sunday that started very early, had a flurry of activity early, and was never destined for huge projects (MAJOR disaster this afternoon trying to do a project that was just too much...more on that later). The button headband project was made for sleepy days like today--easy to make, necessary when doing your hair is just not a priority and ideal to wear when life hands you a day to beautiful to stay in the studio. I wore mine on a gardeny photo shot (more to come on that front too) and while augmenting our bounty at the farmer's market and it got a lot of smiles.
Big buttons, teeny buttons, nothing matchy...perfect for the weekend.
I started with some of my very favorite mismatched buttons,
a headband with an elastic back (you could also make your
own headband or sewing them onto elastic), an embroidery needle
and some white floss.
I forgot to take a photo of the inside, but I simply placed
and fit each button, sometimes overlapping them, and secured them
through the button holes with the embroidery floss. I did
not cut and tie after button, but rather went right from one to the next.
I love it--easy, fun, and it goes with everything!
Stay tuned to hear about my misadventures in spray paint
and to check out my current photo project :)
Thanks for reading and have a great week!
Saturday, April 28, 2012
Stitchy Saturday: Lace Headbands
Wearing lace can be a little tricky. A gal can end up either looking like a baby or a granny. That's why these headbands, designed by the super-talented ladies at A Beautiful Mess are perfect. Their design was for a head band using three types of lace, but I decided to experiment with some single pieces of wide lace too.
![]() |
| I only planned on making one. But, I ended up with four and plans to make more. |
![]() |
| The original design called for lace to tie under your hair, but thought that ribbon would work better and be a little more fun. |
![]() |
| Perfect for a busy day in the studio. |
![]() |
| Six hours later, and my hair is still in place :) |
Sunday, April 8, 2012
Sunday Funday: Crafting through the Crap
Today was not what I expected. Last night, I was incredibly excited to get up at make things. And then, I actually did get up. All the problems of my real life kind of piled up and knocked me back down. I am having a down day to be sure--insecurity, career fears, monetary issues--things that we all deal with but I have been having an especially hard time with them this week. It is hard to think about just creating when everything brings up another issue.
After a long talk with someone incredibly dear to me; I got up, put on my favorite working ensemble and put up my hair. I got out some supplies, turned on Mad Men and got to work on today's projects.
I was, and am, distracted. I mis-measured some of my fabric because I was thinking of something else. I had to pull out seams because my mind wasn't completely on my task. I struggle to stay in the zone. After a while though, I got into more of a groove. Cutting table, sewing machine, ironing board, cutting table, sewing machine, ironing board...
My seams are not straight. My composition could have been a little better. But I made something. I intend to make more as the night goes on. I have two more days to do whatever I want. I have a huge list of blog topics and an even longer list of projects to work on. My mood is still not great. My mind is still flitting, thinking of problems. But it also thinking about thread, fabric, glue, tag board, and metal.
Many people say "Fake it 'til you make it." I say "CRAFT THROUGH THE CRAP."
After a long talk with someone incredibly dear to me; I got up, put on my favorite working ensemble and put up my hair. I got out some supplies, turned on Mad Men and got to work on today's projects.
I was, and am, distracted. I mis-measured some of my fabric because I was thinking of something else. I had to pull out seams because my mind wasn't completely on my task. I struggle to stay in the zone. After a while though, I got into more of a groove. Cutting table, sewing machine, ironing board, cutting table, sewing machine, ironing board...
My seams are not straight. My composition could have been a little better. But I made something. I intend to make more as the night goes on. I have two more days to do whatever I want. I have a huge list of blog topics and an even longer list of projects to work on. My mood is still not great. My mind is still flitting, thinking of problems. But it also thinking about thread, fabric, glue, tag board, and metal.
Many people say "Fake it 'til you make it." I say "CRAFT THROUGH THE CRAP."
![]() |
| One of my two fabric inspiration boards. I chose several fabrics that I hope to incorporate into a quilt. I decided to put it on my cutting table to keep me focused and inspired. |
![]() |
| Sadly, this hair means business. |
![]() |
| Four themed fabrics sewn into a panel. |
![]() |
| After sewing together and pressing, I wrapped the panel around the glass of a frame that picked up at the thrift store. |
![]() |
| For my second panel, I used an old gilt frame that I also picked up at the thrift store. It was trickier since it was older and had last been used for a professional framing job. |
![]() |
| Added it to my inspiration wall near my sewing machine. |
![]() |
| Fabrics that I absolutely love. I am definitely making this into a girly birdy quilt. |
Tuesday, April 3, 2012
How Tuesday: What's the buzz? beanbag tutorial
These days, cell phones are everywhere. We talk, we search, we surf...it is like a tiny computer in your pocket. If you are like me, your cell phone is on all the time. Recharging is a necessary evil. Problem is that if your phone is on vibrate (like mine is...always) while charging, it make a god awful noise shaking against the table, the counter, wherever it lands when it shakes onto the floor.
It came to me (as the phone was rattling and buzzing away next to my head while I was trying to sleep) that my phone needed its own little bed.
Today's "How Tuesday" tutorial will focus on a little rice-filled bed I crafted up for my lil' buddy. It is a variation on a pretty basic beanbag pattern, so the uses are many.
It came to me (as the phone was rattling and buzzing away next to my head while I was trying to sleep) that my phone needed its own little bed.
Today's "How Tuesday" tutorial will focus on a little rice-filled bed I crafted up for my lil' buddy. It is a variation on a pretty basic beanbag pattern, so the uses are many.
![]() |
| I used a 10x10 piece of flannel, some fun trim and rice as the filling. You could also use beans or popcorn. |
![]() |
| Stitched on the trim with my trusty old featherweight. If your machine can do decorative stitches, this would be a great spot for them. You could also top stitch or embroider a design. |
![]() |
| Folded the piece in half and pinned the right sides together. Sewed one long edge and one short edge closed. |
![]() |
| Turned the piece right-side out and filled with rice. I used about 1 3/4 cups. |
![]() |
| Folded the rough edges under and sewed the open end closed. |
![]() |
| Ahhh, a restful place for my phone to charge. By utilizing smaller squares, you could make beanbags for the kids. |
Subscribe to:
Posts (Atom)