Proverbs tell us that "The first step is hardest." or "A journey of a thousand miles begins with a single step." Well, I took the step. I figured if I was going to design and market a line of patterns, that first I needed a name and a logo. Two friends and I have a dream of opening an stitching shop with a tea bar and calling it "teany.tiny.stitches." Yes, we know that "teany" is misspelled. But we are going for a cutesy little joke. TEA. Get it? I love the name, so I decided that it suited this new venture. Since it is all about stitching, I knew that the logo needed to be stitched. So that is where I am in the process, if you can call it that.
Friday, July 26, 2013
Thursday, July 25, 2013
New Ventures, New Adventures!
I have always been a thinker and often-times, an over-thinker. Many people are guilty of this (especially women.) Since losing my job, I have had PLENTY of time to think. Sometimes, I think about my worth or lack thereof. It is truly amazing how much of our self-worth is linked to our jobs. It defines us and I felt as though I lacked definition. That is until last night...
After a fabulous anniversary dinner date/trip to the library with my sweetie, it struck me: I AM AN ARTIST. Therefore, I have a job. I have been given a gift: time. I get to experiment in the kitchen, garden, walk, take photos, sing and dance, enjoy the sun, see my friends, and CREATE. Sitting behind a desk would limit these experiences, so why am I moaning. I should be reveling in it.
I have decided to spend the rest of the time I have been given doing just that. I will be focusing more on creating embroidery patterns to share and to sell. I will complete that blasted set model. I will embellish. I will make. JOY!
Wednesday, July 24, 2013
WIP Wednesday: CS Lewis Embroidery
I really meant to be a better blogger. I have been taking photos all summer long...tons of food prep shots, a baziilion macros, gardens, waterfalls, and festivals. I had every intention of sitting down every evening and writing a blog post. Sadly, being unemployed and constantly looking and anticipating is utterly exhausting. The process takes your best intentions and whisks them away. I tip-toed in and made a few design changes. I have been making and planning. I am assisting my local bead store in a move/re-design. In fact, if it wasn't for the money (and therefore, the job) necessary to live, my life would be perfect.
I have been spending time each night looking at inspirational quotations on Pinterest. I truly think that I may take some and design a line of embroidery patterns like to one above. I am taking Mr. Lewis's words to heart, "Hardships often prepare ordinary people for an extraordinary destiny."
Keep an eye out for the pattern here soon.
Friday, June 28, 2013
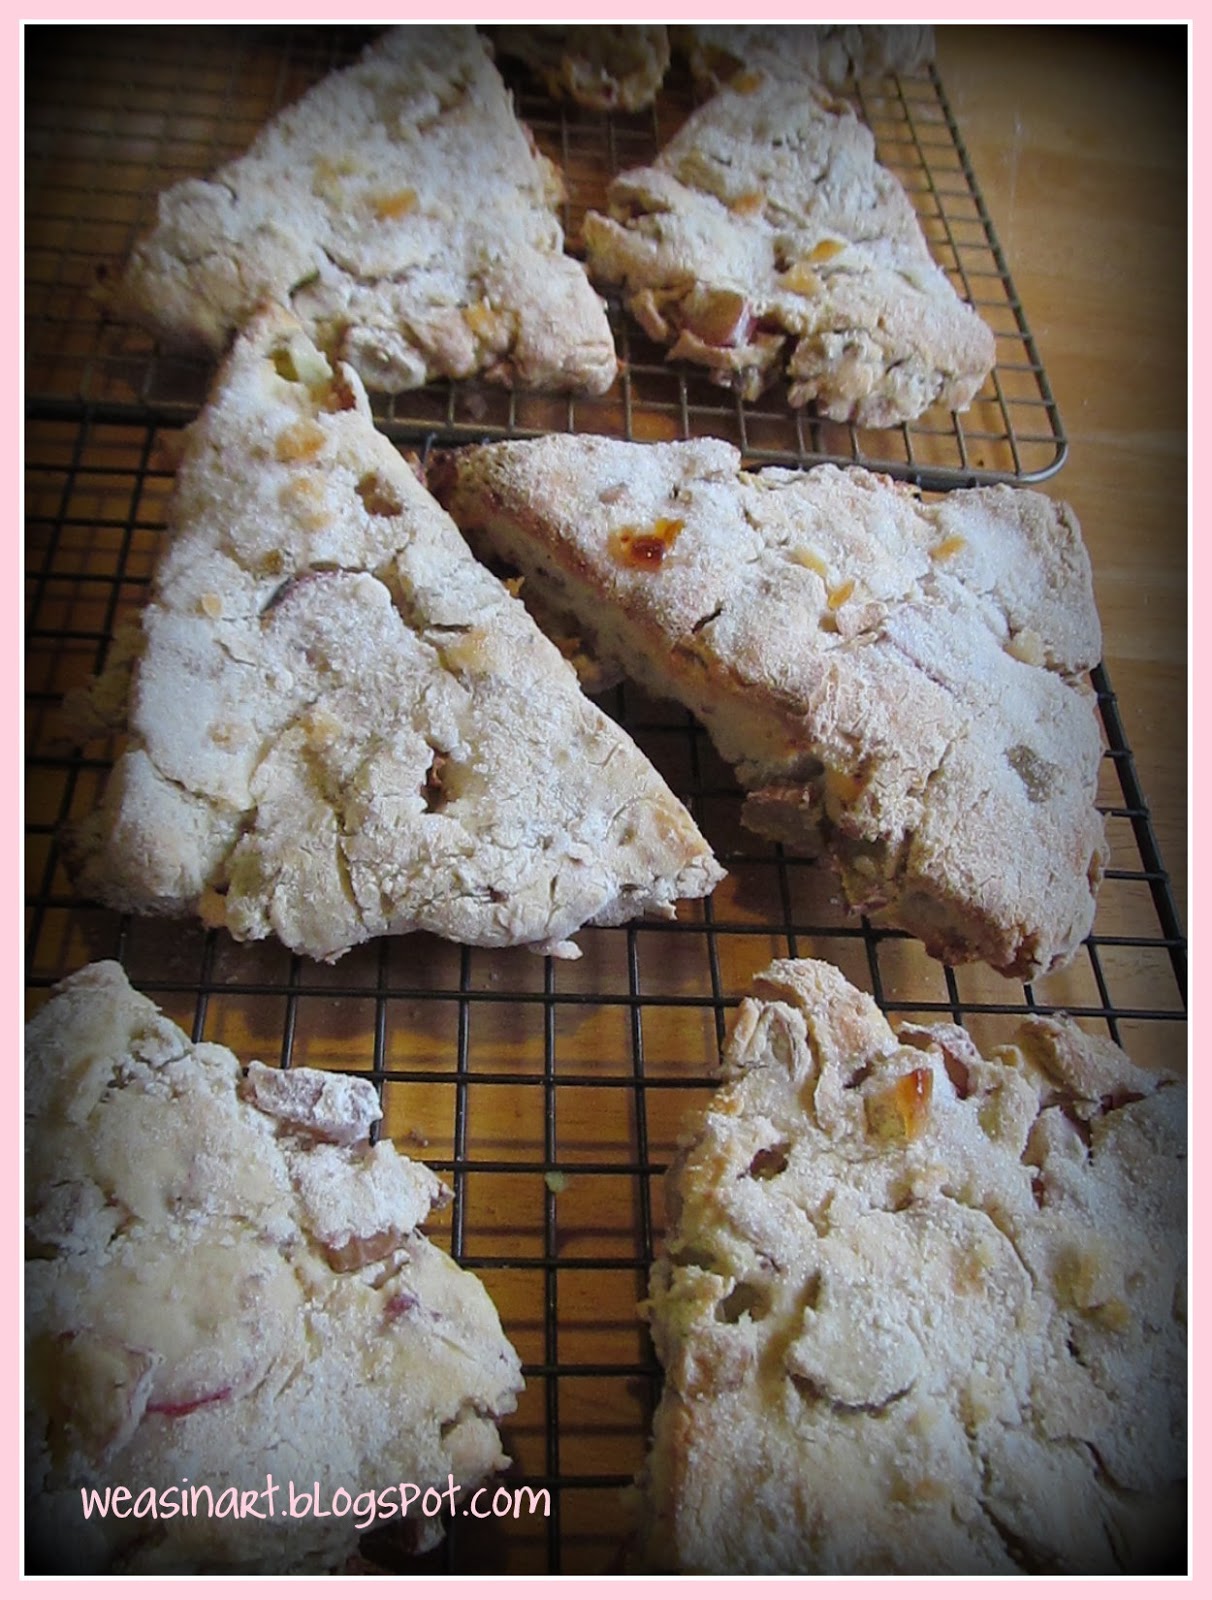
Foodie Friday: Rhubarb Ginger Almond Scones
If nothing else, this time of under-employment has allowed me to do things I really love:
garden, sew, walk, read, and bake. I was especially happy to bake these scones. I developed a recipe after comparing a lot of different scone recipes. These seem old-fashioned and delightful, perfect for brunch with friends or as heart-felt handmade gift.
Weasinart's Rhubarb Ginger Almond Scones:
Ingredients:
- 3 stalks rhubarb (14-16 ounces)
- 2 1/2 cups flour
- 1 tsp baking powder
- 1/2 tsp salt
- 8 TBSP unsalted butter
- 1/2 cup sugar
- 1/2 tsp vanilla extract
- 3/4 cup plain Greek yogurt
- 1 TBSP crystallized ginger
- 1/4 cup almonds
Directions:
Preheat oven to 425 F. Line baking sheet with parchment or silicon mat. Because I made my scones into wedges, I needed to use two sheets.
Cut the rhubarb into small pieces.
They will break down a little in the scone, but keep things bite-sized!
Toss the rhubarb with 3 tablespoons of sugar and the ginger.
Dice the ginger fine, if necessary.
Chop the almonds and fold into the rhubarb mixture.
Sift flour, 1/4 cup sugar, baking powder, and salt together in a large bowl.
Cut butter into flour mixture until the butter is about the size of small gravel.
Add in the rhubarb mixture, vanilla, and yogurt. Stir together until a soft dough forms.
Flour your hands and knead the dough for a minute or so,
until the dough comes together and is not sticky.
Turn out the dough onto a floured surface and pat the dough into a disc.
Using a bench scraper (or a knife), cut the dough into 8 wedges.
Arrange on sheets and sprinkle with remaining sugar and some of the crystallized ginger.
Bake for 18-20 minutes or until golden brown.
Serve warm and/or seal in an airtight container.
Enjoy!
This post is dedicated to my all time favorite blogger, chef, and friend,
Sara at The Cozy Herbivore.
Thursday, June 20, 2013
DIY Upcycled Clothes Pin Bag
When we are kids, we never truly value the cool things that are around us. I remember both my mom and grandma having a clothes pin bag that they scooted along the line as they hung out clothes. It was just there: something that always was. A part of life. As an adult, I have stored my pins in a wicker basket and have never been completely satisfied. It occurred to me that I wanted what we had growing up, but they are tough to find. Time to make up a pattern and get going!
Like everyone else that I know, I have a fabric stash. You could use something from there, use tea towels, old bath towels, a pillowcase, or do what I did: use part of a soft and sweet vintage sheet. It had been used so many times that it started to wear through and rip.
A new life if in store for it here! I took a section about 14 inches wide (the width of the pants bar on my wooden hanger) and approximately 36 inches long.
I am obsessed so I knew that I needed to add some. I found this a local shop that resells donated fabric, trims, and notions a while back and have worked it in to many projects. I sewed a strip along the edge that will be the opening and another about two inches down. This is where you can be super creative with ribbon, applique, embroidery, whatever you love!
I knew that I wanted a pretty sizable bag, hence the 36 inch total length but again you could make the bag whatever size suits you and your fabric. Once I sewed on the trim, I folded up the edge with right sides together. I sewed the sides up and turned it right side out.
Lastly, I sewed a strip of hook and loop tape to the top edge (which as nicely finished since I used the top edge of the sheet) and another strip about 3 inches down, both on the right side of the fabric. I folded it over the pants bar and loaded it up.
Ready to hang!
Labels:
clothes pins,
DIY,
free pattern,
re-use,
sewing,
tutorial,
upcycle,
vintage
Tuesday, June 4, 2013
Comfort Food Re-imagined
Being chronically under-employed has it perks: I get to work in the garden more, I get to hone skills, I get to spend many of my days with my students, I get to try some new things that I did not have as much time for before. It also has its pitfalls: depression comes in waves, I am unmotivated to do new projects, and I eat...more than I should. As many women before me, my go-to stress snacks are sweet and crunchy. Ice cream though is expensive and fattening. Enter chocolate banana "nice" cream sandwiches!
Sunday, June 2, 2013
Sunday Funday: DIY Terrariums & Rock Gardens
In this time of diminished employment (I did not get the job, btw); I have been doing a lot of gardening. I have put in many hours in my herb and veggie gardens, at our plot at the Community Garden, and at my favorite guy's place. My house itself was feeling a little neglected. We unearthed some moss and I was recently gifted a miniature boxwood. You know what that means?! Rock gardens and terrariums.
Subscribe to:
Posts (Atom)